.png)
Perculus - Basic Instructor User Manual (English)
Ürün/Product: Perculus (Web) |
PDF of the Manual: Perculus - Instructor User Manual.pdf
Reviewing this manual will help you navigate and use the system effectively.
This guide has been created to assist you in using the Perculus platform for conducting your virtual classes.
I. General Overview
Perculus is a virtual classroom platform that enables remote live education and meetings on computers and mobile devices.
What can be done with Perculus:
Live video and audio streaming,
Planning activities to be used in the pre-class with the course flow feature,
Creating a course flow program for using in different sessions of the same class,
Activities that can be added to in-class and lesson flows: Whiteboard, Upload Document, Screen Sharing, Second Camera, Share Video, Upload Video, Create Breakout Rooms, Figma Board, Padlet, Pin Yourself, Google Docs, Miro Board, Two Truths One Lie, Word Cloud, New Question (Multiple Choice, Single Answer Questions, Multiple Choice, Multiple Answer Questions, Short Answer Questions), Guesstimate, Likert Scale, External Application, Natal Chart, Brainstorming, Axis Grid
Live use of drawing, shape, and text tools on shared documents and whiteboard,
General and private messaging,
Session invitation,
Detailed messaging settings,
Camera and microphone freedom for all participants based on settings,
Enable score based participation check,
Simultaneous translation,
Downloading messaging history.
Sessions are recorded based on the session settings, and participants can access these session recordings for review later. All session and review reports can be obtained.
II. System Requirements
The requirements to use Perculus as an instructor or session manager are as follows:
A modern and up-to-date web browser;
"Google Chrome and Microsoft Edge browsers provide the most compatible experience for desktop devices and mobile devices running the Windows operating system.
Google Chrome and Chromium-based browsers provide the most compatible experience for desktop devices and mobile devices running Linux and Android operating systems.
For Apple desktop devices running the MacOS operating system, you can use Google Chrome.
For mobile devices (iPhone and iPad) running iOS 12.0 and above, you can use Safari.
You can also use other modern browsers. However, you may not be able to use functions that are not supported by other browsers."
A minimum bandwidth of 1 Mbps is required for downloading and uploading.
A smoothly operating computer or mobile device (Android and IOS).
A webcam (if a camera will be used during the session).
A microphone (if a microphone will be used during the session).
No additional plugins are required in the Google Chrome browser for screen sharing.
III. Login to the Perculus
Enter your created Perculus web address into your browser's URL address bar to access the Perculus web address. (e.g.: your_adress.percul.us) To access the system's features, you need to log in. Use your username or email, enter your password, and after completing the captcha security checks, log in to the system.
Log in to your institution Perculus address.
Enter your username in the e-mail or username text box at the top of the page.
Enter your password in the password text box located second from the top on the page.
Click on the remember me selection box located third from the top on the page.
Click on the I am not a robot selection box, fourth from the top on the page.
Click on the login button located fifth from the top on the page.
If you are logging in for the first time, you will see a window to change your password and a personal information page.
IV. Home
You can access the homepage by clicking on the home button located on the left of the screen.

Today's Sessions: In the list of today’s sessions, you can view sessions that are starting today or have already started. You will see session names, start times, statuses, and information about how long ago they started or how long until they start.
Future Sessions: In the list of future sessions, you can view sessions that will start on a future date. You will see session names, start times, statuses, and information about how long until they start.
Past Sessions: In the list of past sessions, you can view sessions that have occurred in the past or were unable to occur. You will see session names, start times, and status information.
My Calendar: Click on the 'My Calendar' button to view your past, present, and future sessions in daily, weekly, and monthly formats within the calendar. By clicking on the names of the sessions you see in the calendar, you can join virtual class sessions and watch the re-recordings of virtual class sessions.
My All Sessions: You can switch to the sessions page by clicking on the 'my all sessions' button.
Edit My Profile: You can go to the settings page where you can edit your personal information by clicking the "edit my profile" button.
Change My Password: When you click on the "Change My Password" button on the homepage, the password change window will automatically open. However, you can also change your password from within the profile settings.
Help: You can click on the "Help" button on the homepage to chat with support staff or access help documents.
V. Rooms
If you frequently hold meetings or training sessions on the same topic or with the same group of people within Perculus, you can take advantage of the Rooms feature, designed for your convenience. Simply create a virtual classroom using the Rooms feature once and conduct your virtual class or meeting anytime you want.
Click on the rooms button, located third from the top on the left side of the window.

Click on the new rooms button, located to the right of the "Rooms" text at the top of the page.


Enter the room name in the “Room Name” text box.
Select the room language as Turkish, English or Arabic from the language drop-down list.
Enter your tags in the Tag text box (for multiple tags, press enter after each tag).
Select a flow from the 'Select Flow' drop-down list.
Activate or deactivate the 'record session' selection button by clicking to the right. (Attention: If the session recording feature is active, the session will be recorded. If the session saving feature is inactive, the session will not be saved).
Activate or deactivate the 'Restrict Access to Replay' selection button by clicking to the right. (Attention: If Restrict access to replay is active, the session will be recorded but the replay will not be available. If Restrict access to replay is inactive, the replay can be viewed by session participants).
Click the save button at the bottom right of the window.
A new room (scheduled) has been created and you can join it by clicking the join button.

(See “Join the Session or Room” to view virtual classroom session details).
VI. Sessions
Click on the sessions button, which is the second one from the top on the left side of the window. On the session page, you can create new sessions, delete sessions, join sessions, and watch recorded sessions. You only see sessions for which you are authorized or a participant.

Start Session (Quick Session)
You can schedule your virtual classroom sessions, or you can start a virtual class instantly without any special setup for impromptu needs. Simply click the "Start Session" button, and you'll be instantly taken to a session where you can invite participants through an invitation link.

Log in to your institution's Perculus panel.
Click on the 'start session' button located in the top right corner of any page.
A session is quickly created, and you have transitioned to the virtual classroom session.
When you log in, an invitation link will appear in the middle of the page.
Click on the invitation link (link - URL) or the copy button.
Send the invitation link to the people you want to join the session.
People who want to join the session can register with their first and last names and send a participation request.
(See “Join the Session or Room” to view virtual classroom session details).
Adding New Sessions (Planning)
a. Click on the new session button, located to the right of the "Session List" text at the top of the page.


b. Enter the session name in the text box located in the first row at the top of the pop-up window.
c. Click on the session start date and time text box located in the first position in the third row at the top of the window.
d. Select the desired date and time for the session from the pop-up calendar.
e. Write the total duration of the session in minutes in the text box located in the second position in the third row at the top of the window.
f. Click on the save button located at the lower right of the window.
g. A new session (planned) has been created, and you can join it when it starts.
(See “Join the Session or Room” to view virtual classroom session details).
Adding Participants to the Session from the User List
Click on the options (three dots) button to the right of the row of the session whose participants you want to view, and in the window that opens, click on the participants button, second from the top.

On the session participants list tab, click on the add participant button in the top left.

In the user list, click on the checkboxes next to the usernames to select individual users. Then, click on the save and close button in the bottom right of the window.

Click on the external participants text (tab) in the center at the top of the window and enter first name, last name and email address. Add participants to the session one by one by clicking the add to list button. Then, click on the save and close button in the bottom right of the window.

You can send invitations to participants to join the session by clicking on the Send invitation button at the top right of the list of session participants.

VII. Join the Session or Room
Once the virtual classroom is created, it will become active when your scheduled class time arrives. We recommend that you check your microphones and cameras before starting the class to make sure everything is working properly.
a. First, click on the “Join” button to join the Virtual Classroom session or room.


After joining the virtual class rooms, you will need to join the session by typing your first and last name.

b. Next, you will see your speaker, camera, and microphone settings. If you are using more than one camera or microphone, make sure to select the correct ones.

c. Your Default Camera will be selected. But if you have an external camera, you can choose it.

d. It will be selected by default on your microphone. But if you have headphones plugged in, you can choose the microphone you prefer to use.

e. Your speaker will come with your computer itself. If you are going to use a different speaker, you can choose it.

f. After making all your settings, click the Join Session button.

1. Starting the Lesson
As the instructor, you have the authority to start the course. If you want to upload course presentations before beginning, follow the document upload steps. You can also upload documents after the course has started.

Virtual Classrooms does not start until you, as the instructor, click the Start button.
a. Click the Start button to start the lesson.

b. You must confirm by clicking the start session button.

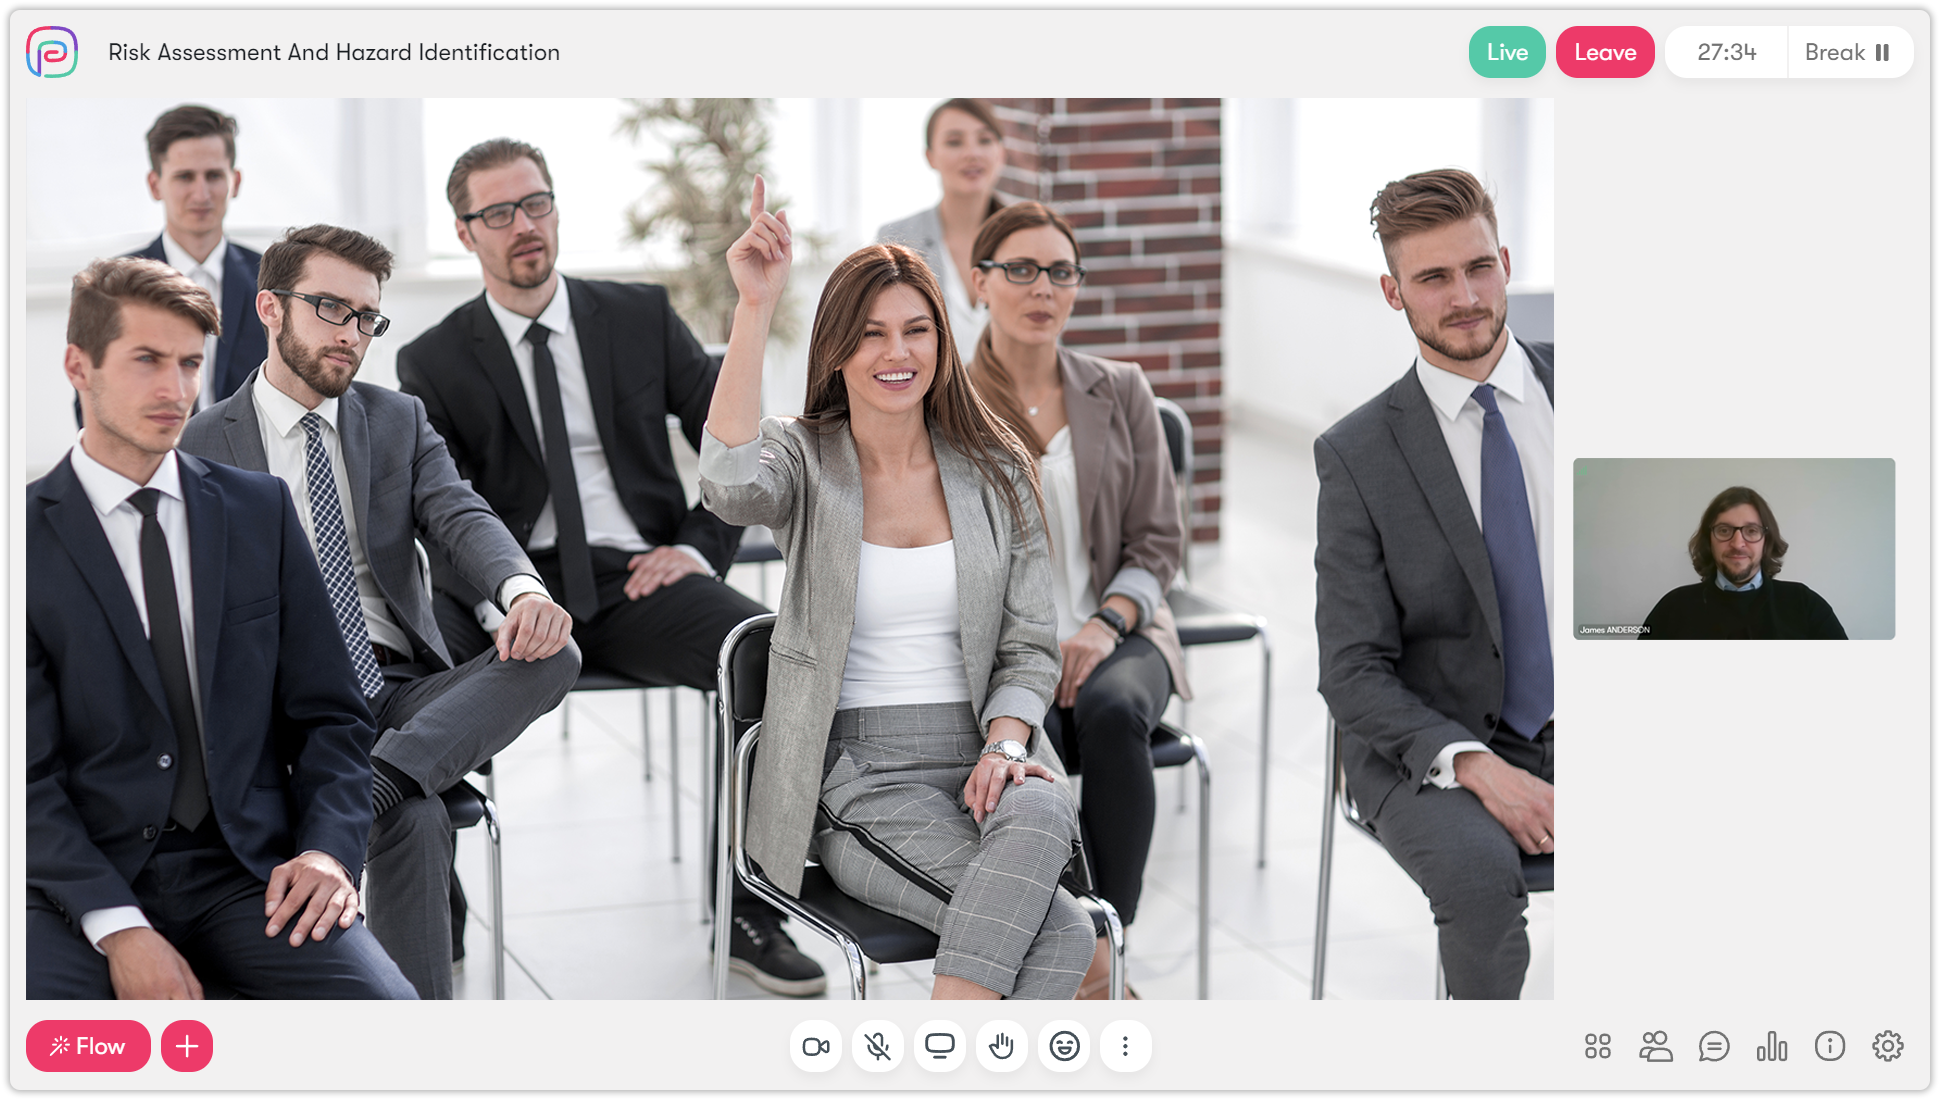
c. Then your virtual classroom begins, you'll see the word "LIVE," indicating that the session has started.

2. Turning on Camera in Virtual Classroom
After your virtual classroom starts, follow the steps below to turn on your camera.
a. Click over the camera icon at the bottom if you want to turn on / turn off your camera.


b. After clicking and waiting for a moment, your camera feed will appear on the screen. You'll know your camera is on when the camera icon lights up and your image is displayed.

c. If you are having problems, check your Google Chrome Camera permission.

3. Turning on a Microphone in a Virtual Classroom
After your virtual classroom starts, follow the steps below to turn on your microphone.
a. Click to the microphone icon at the bottom of the page.

b. Your microphone will activate. You can tell it's on when you see the green volume bar moving and the microphone icon is lit.

VIII. Virtual Classroom Menus
1. Participants Menu
This is the menu that allows you to see the participation of students registered in your course in the virtual classroom. It is the first of the menus in the lower right corner of the page.
Click on the participants icon your active participants in the virtual classroom will be listed.

If you wish, you can give your students Camera, Microphone and File Sharing permissions from here.

Click to send a Camera sharing request to your student named Eda.

Click to send a Microphone sharing request to your student named Eda.

If you want your student named Eda to upload documents to the virtual classroom, click to authorize. If you do not give students file sharing permission, students cannot share documents in the system.

You can expel students who sabotage the lesson.

2. Chat Menu
This is an area designed for you to communicate with students enrolled in your course and students in the virtual classroom.
When you click on the chat icon, you can type the sentence you want in the chat window that will open and send your message by clicking the Enter key or clicking the tab. It is an instant chat box. It becomes inactive after the virtual classroom is over.

3. Session Statistics Menu
This feature measures whether the students enrolled in your course and present in the virtual classroom are actively listening and attentive to the lesson.
First, click the analytics button. To activate this feature, you must first activate the I'm Here Feature.

When students acknowledge the prompt that appears on their screens at specific intervals, you can check their scores through the statistics menu.

The alert that will appear on the student's screen will prompt them to click the "I'm Here" button. The quicker they respond, the more points they will earn.

4. Information Menu
In this menu, you can access information about session details.
Additionally, if you have guests who are not registered for the course, you can invite them to your live lesson using the Invitation Link. However, when guests click on this link, they will need to register by providing their name and surname.

5. Settings Menu
In the Settings section, you can make adjustments to your session settings and your profile.
When you click on the settings icon, you will see the following options:
· Profile photo: You can add your own photo by pressing the "Change" button.
· Camera / Microphone Settings: You can adjust these settings if you need to use a different camera or microphone, similar to the setup when entering the session.

· Session Settings: Here, you can manage various settings organized into the categories of Messaging, User, and History.

In the features in the messaging section, you need to click on the box next to the feature you want to be active and click on the Save button.

In the features in the user section, you need to click on the box next to the feature you want to be active and click on the Save button.

In the History section, select the box next to the feature you want to activate and click the "Save" button. You can also select delete all session messages from here.

IX. Virtual Classroom Time Display Menus
These menus are located in the upper right corner of the screen.

The icon indicates that the virtual class has started.

This button allows us to leave the virtual classroom before the scheduled end time. If you, the instructor, end the session, the session will be closed for everyone.

This indicator shows the time remaining until the end of the virtual class.

This button allows you to take a break during your live lesson if needed. Click the button to initiate a break, then enter the desired duration in minutes and add a break note.


If there are 10 minutes left before your lesson ends, the system allows you to extend the session. Click the "Extend +" button to do so.

Then, you can choose from the following options: +10 minutes, +30 minutes, or +60 minutes. You don't have to use all the extra time; you can end the session at any point by clicking "Leave.”

X. Menus on the Home Screen
This section will cover the menus and their functions located in the center of the main screen.

This is the camera icon that lets you turn your camera on.
This indicates that your camera is on.
This is the microphone icon that allows you to turn your microphone on.
This indicates that your microphone is on.
This indicates which students have raised their hands.

You can access other settings with the three dots icon.

This is the icon that allows you to share your screen.
1. Steps to Screen Share
If you plan to share your screen and present to students during your lesson, follow these steps.
a. Click to the screen sharing icon.
b. If you choose to share a Chrome tab, select the specific tab you want to share. This way, only the selected Chrome tab will be visible to students, and your other activities on the computer will remain private.

c. You can choose to share a specific window. This way, only the selected window will be visible to the students, and your other activities on the computer will not be seen.
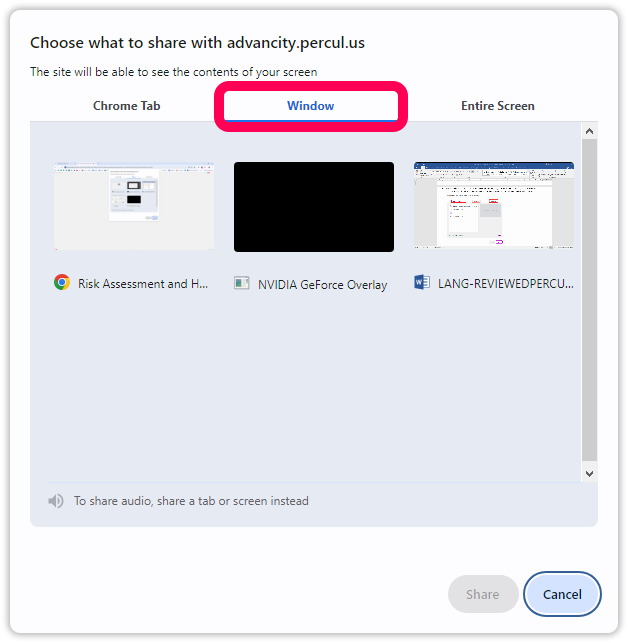
d. To share your entire screen, select your screen from the "Whole Screen" section. If you want to include system sound, ensure the "Share system sound" option is active. Once you've made your selections, click the "Share" button.

Your screen will be shared without any issues. You can stop sharing by clicking the "Stop Sharing" button.

XI. Flow Menu
The flow menu allows you to utilize multiple documents, videos, screen sharing, and other methods during your virtual classrooms. The Flow panel is a tool that lists the tools you've used, enabling you to easily return to previous documents or presentations. For example, if your students are stuck on a topic discussed earlier, you can go back to the initial presentation using the flow panel.

First, we need to create Activities. To do this, you can click on the red 

Then the following menus will appear.

1. Files and Whiteboards
This is the menu that allows us to upload documents to the system and add a whiteboard.

1.1. Adding a Whiteboard
The steps to add a Whiteboard to your virtual classroom for use in class are given below.
a. Click on the Whiteboard button.

b. Name your Whiteboard activity, and then you can specify how long this activity stays on the page with a timer. After the process is completed, click the Save button.

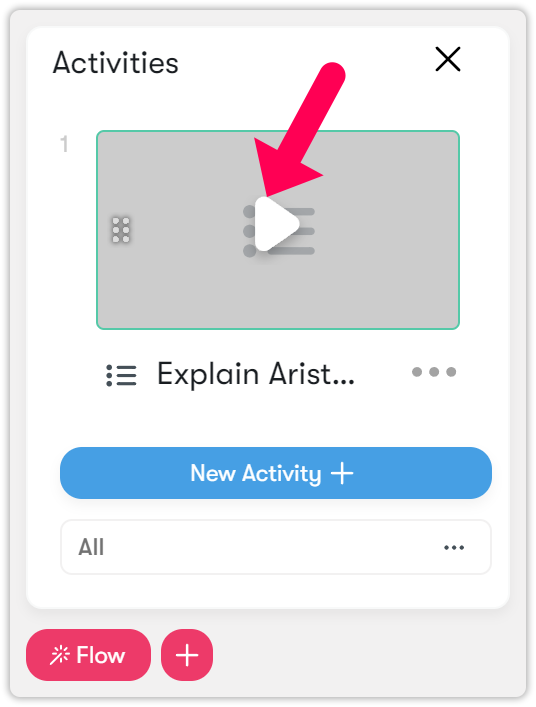
c. The Whiteboard will then appear in the Activities section. When you click the Play button on it, the whiteboard will be displayed on the screen and become visible to the students.

d. You can explain your lesson to students by making drawings. You can find the pen, highlighter, pointer and eraser on the left toolbox.

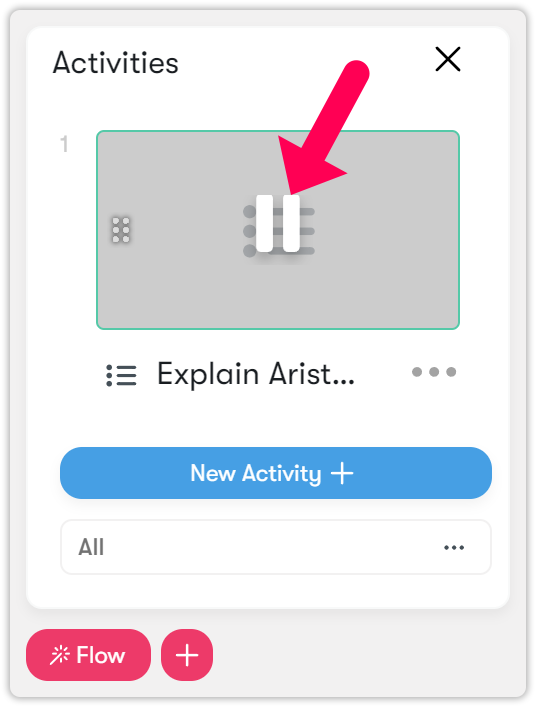
e. If you want to remove the whiteboard from the main screen, you can stop the visibility by clicking the Pause icon.

1.2. Document Upload
The steps for uploading documents to the virtual classroom for use in virtual classroom are given below.
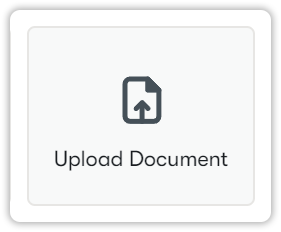
a. Click on the Upload Document button.
b. Then click on the blue plus button.

c. Since only PDF files are uploaded to the system, select your relevant PDF document and click the Open button.

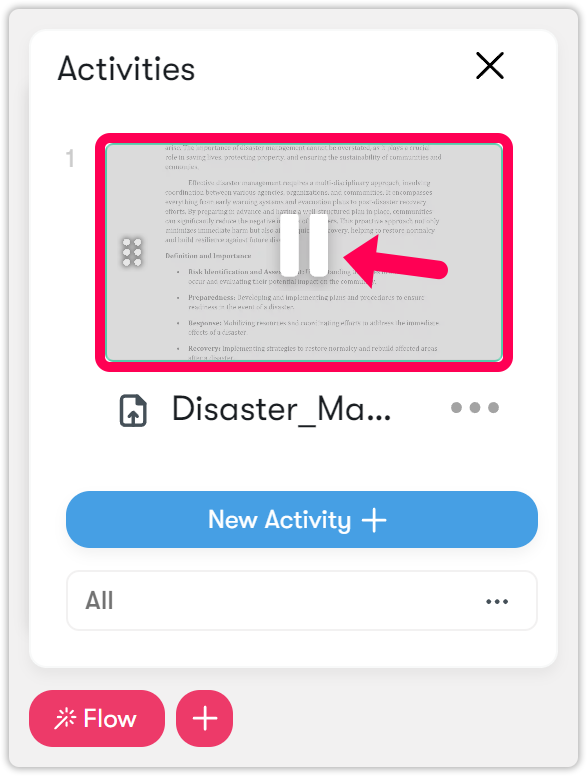
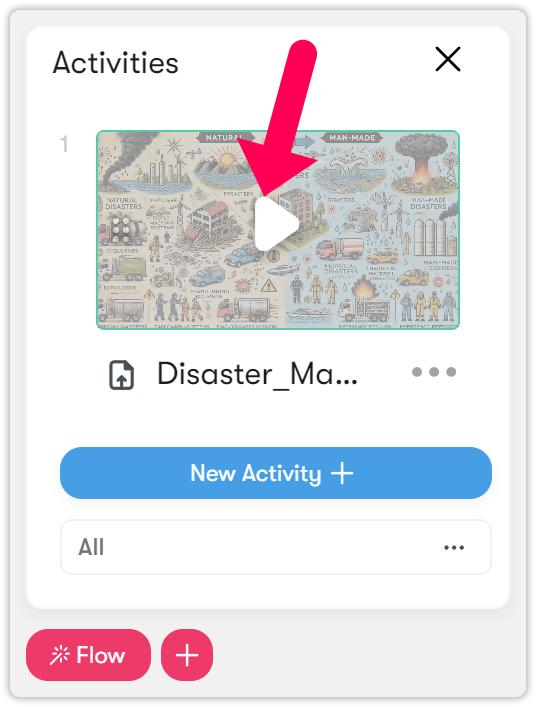
d. Your file has arrived, but click on it to reflect it in the activities section.
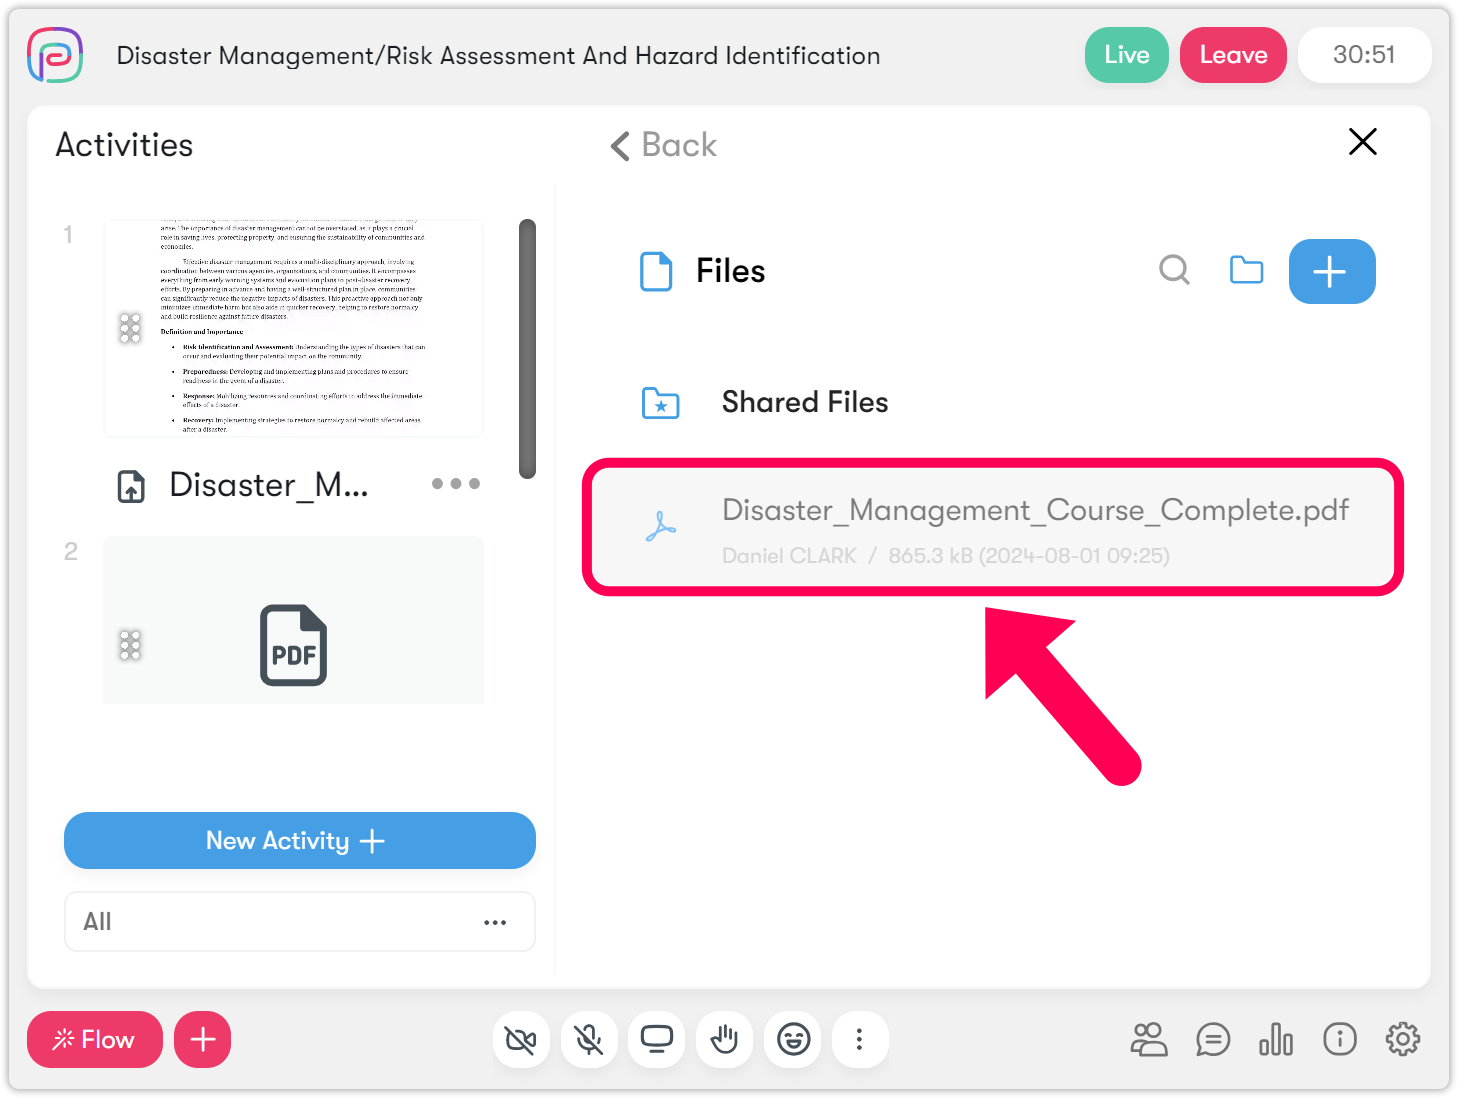
e. You will see that your document is in the activities section.

f. In order for the document to be reflected on the main screen, you must activate its visibility by pressing the Play button, as in other activities.

g. The document is opened to the visibility of students.

h. Press the pause icon on your file in the Activities menu to remove it from the main screen.
Note: You can only upload a PDF file to the virtual classroom. If you have any, you are expected to convert your Powerpoint presentations to PDF format.
2. Videos and Cameras
This menu offers options for screen sharing, using a second camera, video sharing, and video uploading to the system.

2.2. Screen sharing
You can follow the steps below to mirror your computer screen to your students.
a. Click on the Screen Sharing button.

b. Name the activity. If you wish, you can specify your screen sharing duration from the timer section. Then press the Save button.

c. If you press the Play button on the activity. Screen sharing options will appear.

d. If you are going to share a Chrome tab, you can select the relevant Chrome tab. This way, only the relevant Chrome tab will be visible to students. Your other operations on the computer will not be seen.

e. To share your entire screen, select it from the "Entire Screen" section. If you want to include system sound, ensure the "Share system sound" option is enabled. Once you've made your selections, click the "Share" button.

f. Your screen will be shared without any problems. You can stop sharing by clicking Stop Sharing.


2.2. Second Camera
If an external camera is installed on the system, you can benefit from this feature if you are going to use dual cameras in your lesson.
a. Click on the second camera icon.

b. Select the second camera that you want to use during the virtual classroom.

c. After clicking the Save button, the 2nd Camera activity will appear in the Flow section. From here you can press the Play icon.

d. Use the Pause icon to turn off the camera.

2.3. Share Video
You can share videos to your students here by following these steps:
a. Click on the share video button.

b. To share a video, enter the URL link in the "Link" section. If desired, you can specify a duration in the meter section. You can also choose whether to allow students to change video settings. After making your selections, click the "Save" button. Currently, we support YouTube, Vimeo, and Dailymotion.

c. Your video will appear in the Flow. Click to the Play icon to make it visible to students.

d. Your video will start streaming on the screen.

e. To remove the video from the screen, you need to press the pause icon from the Flow menu.

2.4. Upload Video
If you want to use a video in .mp4 format from your computer during your lesson, follow these steps:
a. Click on the upload video button.

b. Click on the blue plus button to upload a file.

c. Then select the video in .mp4 format that you want to upload to the system. Click the Open button.

d. Click on the video to move it to the Flow section.

e. Click to the Play icon to show the video to the students.
f. The video will be shown to students.

g. After you are done with the video, click on the Pause icon in the Flow to remove it from the screen.

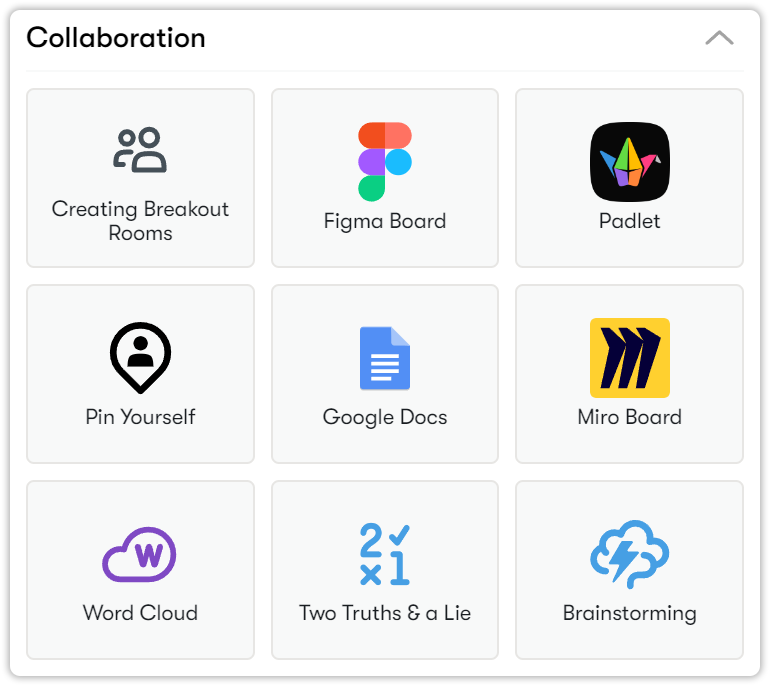
3. Collaboration
The Breakout Rooms feature in the collaboration menu allows you to create groups among students for group activities and discussions.
3.1. Create Working Groups
If you are going to work with a group in your virtual classroom, you can use this feature.
a. Click on the Breakout Rooms button.

b. You can assign name to the breakout room and specify the number of working groups. The students will be evenly distributed among the groups based on the total class size.

c. You can choose the group registration option that best suits your classroom.

d. As instructors, you can switch between groups, but students cannot do so without your permission. Adjust your settings here and click ‘Save’.

e. Then, the Breakout Rooms activity in the Flow becomes active when you press the play button, and students are automatically distributed to groups according to your settings.


f. the Pause icon on the activity in the Flow.

4. Assessments
The assessment menu allows you to interactively use the system, making it easy to ask instant questions.

4.1. New Question
Follow the steps below to create a new question.
a. Click on the new question button.

b. To add a question, click on the Blue plus button.

c. Then select the style of question you want to add.

d. For a multiple-choice question, enter your question text and options. Make sure there's a green checkmark next to the correct answer. For multiple answers, place a green checkmark next to all correct options.


e. For essay questions, provide the question.

f. If your question includes images, you can add an image. Once you've finished, click the Add to session button.

g. Click the Play icon on the activity to publish the question.
h. The question is then broadcast to the students.

i. After the question is answered, click the Pause icon on the activity in the Flow to remove it from the quiz screen.
5. Others
If you need to use some tools such as Google docs or Padlet and want to share them with your students, you can use the External Application feature.


You can share your work with students by getting the embed code from the 3rd party application.


XII. Adding Activities to the System from Shortcut Menu
After clicking the Red plus button next to the Flow menu, it offers you a menu with frequently used features.

a. After clicking on the Screen Sharing feature, follow the same steps as in 2.1. Details are provided in the Appendix for Screen Sharing.
b. After clicking on the new question feature, follow the same steps as in 4.1. Details are provided in the New Question section.
c. After clicking on the feature for creating Working Groups, follow the same steps as in 3.1. Details are provided in the Create Workgroups section.
d. After clicking on the camera feature, follow the same steps as in 2.2. Details are provided in the Second Camera section.
e. After clicking on the Share Video feature, follow the same steps as in 2.3. Details are provided in the Share Video section.
f. After clicking on the Upload Video feature, follow the same steps as in 2.4. Details are provided in the Upload Video section.
g. After clicking on the Upload Document feature, follow the same steps as in 1.2. Details are provided in the Document Upload section.
h. After clicking on the Whiteboard feature, follow the same steps as in 1.1. Details are provided in the Adding to a Whiteboard section.